eSolutions for small businesses
Email Setup
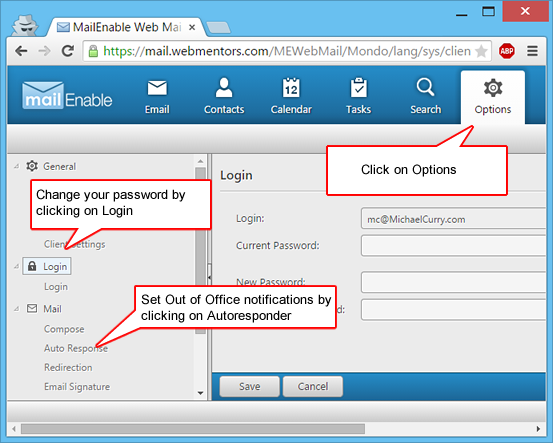
Web Mail
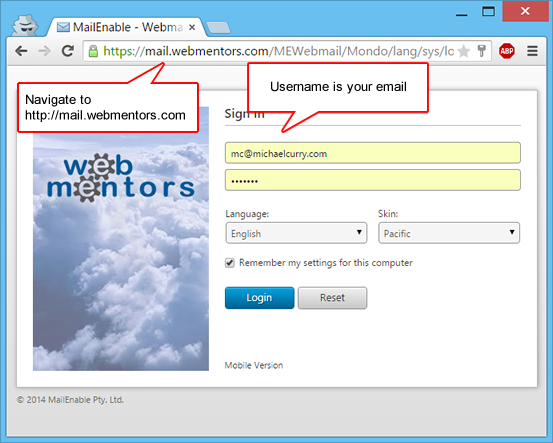
- Point your web browser to http://mail.webmentors.com (or just click on this link)
- Username is your email.
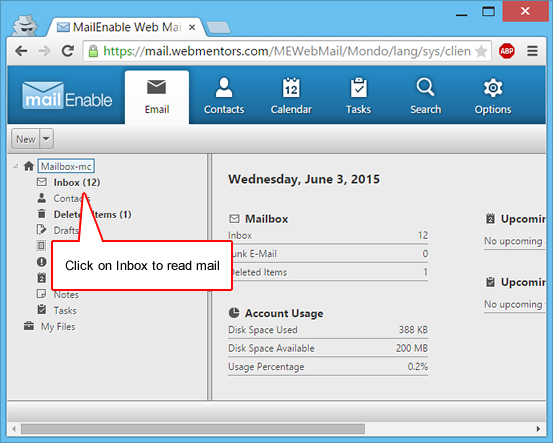
- Click on Inbox to read your messages. There are standard icons to compose, reply and delete messages
- Click on Options, then Login to change your password. You can also set out of office autoresponders from the options menu
Video of Microsoft Outlook Setup
Microsoft Outlook
-
Open Outlook. When the Outlook Startup Wizard opens, select Next. On the E-mail Accounts page, select Next.
If the Wizard didn't open or you want to add an additional email account, on the Outlook toolbar select the File tab.
- Under File choose Account Settings
- Click New icon if creating a new account. Or, if you are fixing an account that is not working, click on the account in the list of accounts.
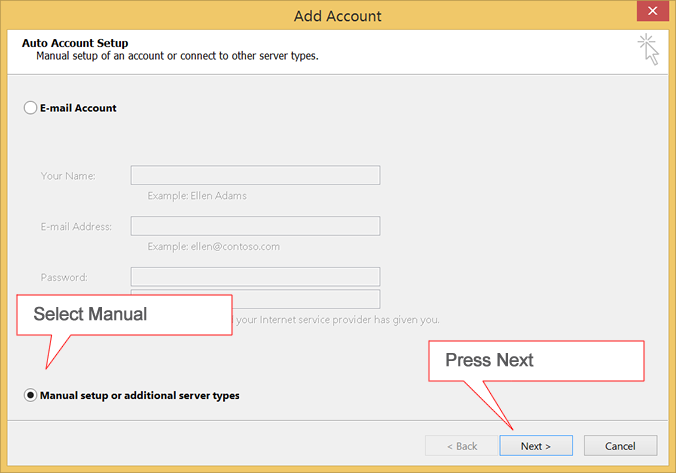
- Under add account, select Manual Setup, then press Next
Select POP or IMAP and press Next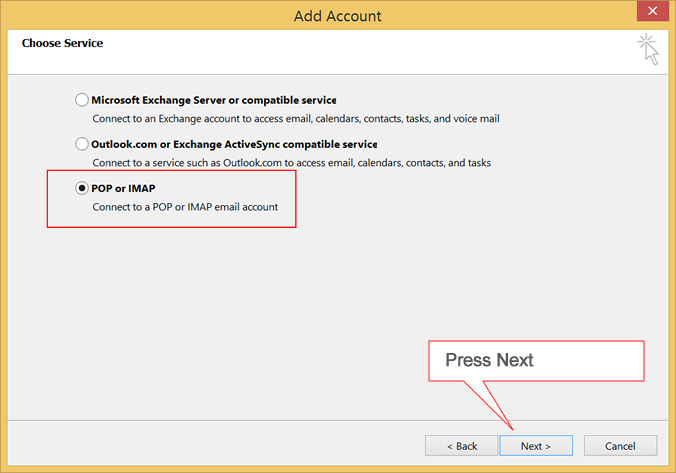
- Enter the account information (note your username is your email address)

- Press More Settings button
- Click the Outgoing Server tab:
Check "my outgoing server (SMTP) requires authentication"
Select "Use same settings as my incoming mail server"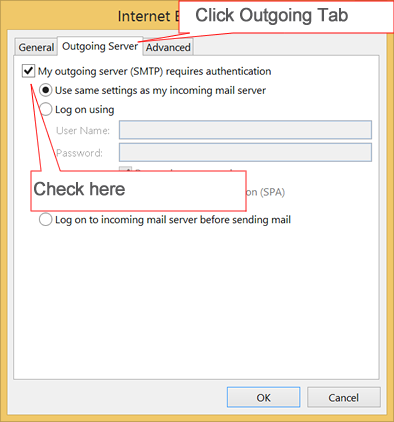
- Click the Advanced tab:
Set Incoming Server (POP3) to 995
Check "This server requires an encrypted connection (SSL)"
Set Outgoing Server (SMTP) to 587
Check "leave a copy of message on the server"
Check "remove from server after" and set to 30 days
Check "remove from server when deleted from Deleted Items"
Click OK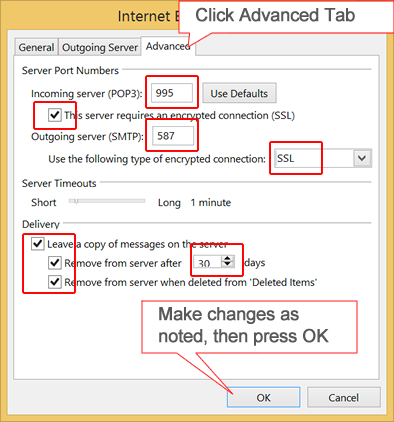
- Click Next and outlook will test your account settings. If the test is successful, press close and then press finish. If the test is not successful, double check all settings again.
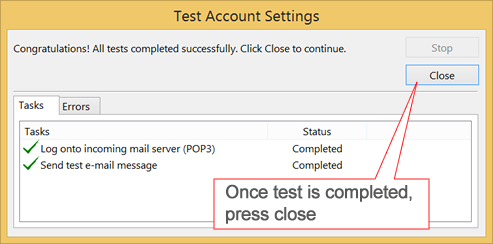
- Press Close
Mac Mail
- Open Mac Mail
- If this is the first time that it has been used, the Setup Assistant will appear. Otherwise, select File / Add Account.
- Choose Add Other Mail Account, then touch Continue
- Enter the following:
- Description, email address and password.
- Incoming mail server is mail.webmentors.com
- Your email is your username. Enter your password.
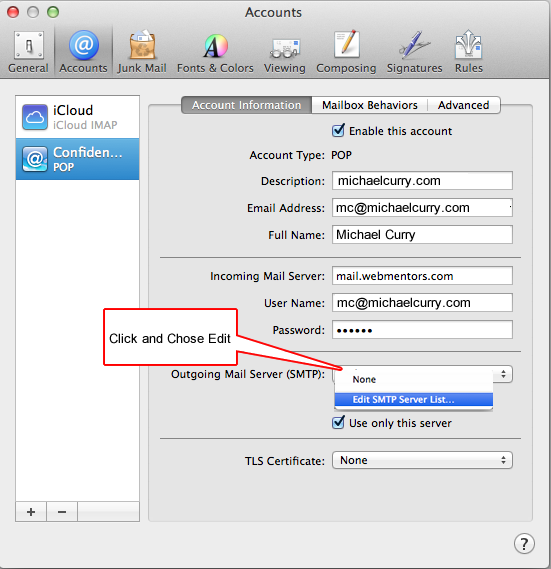
- Under Outgoing Mail Server (SMTP) click the drop down and choose Edit SMTP Server List...
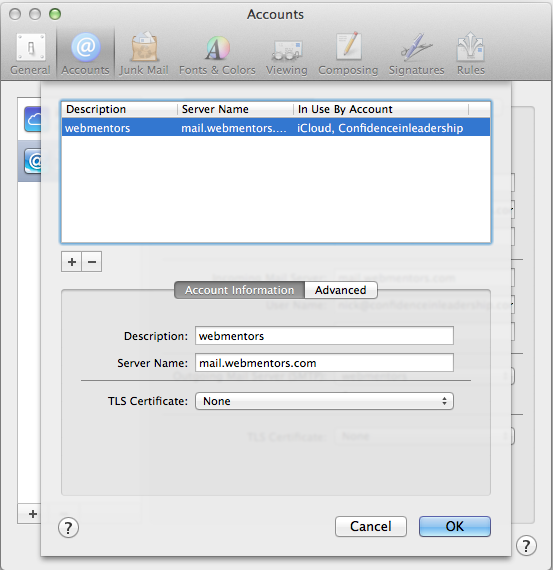
- Under Account Information, enter the following:
- Description (e.g. Webmentors)
- Server Name: mail.webmentors.com
- TLS Certificate: None
- Click the Advanced button and make the following settings:
- Click Use custom port and set to: 587
- Check Use Secure Sockets Layer (SSL)
- Set Authentication to Password
- Set User Name to your email
- Enter your password
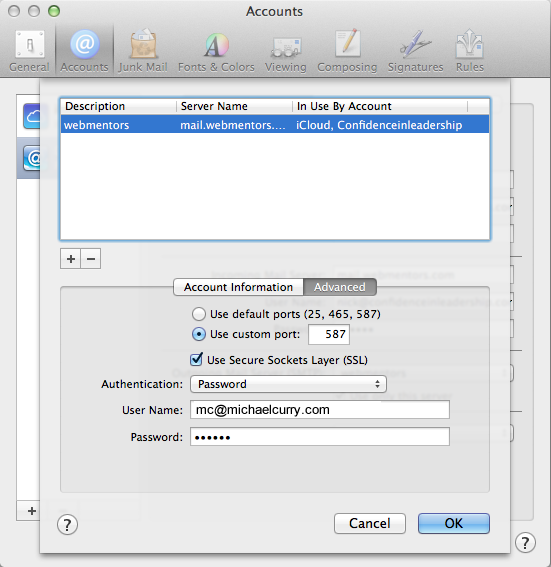
- Press OK.
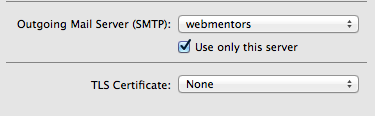
- In the Accounts Window, ensure that the new outgoing server (Webmentors) is selected, and Use only this server is checked.
- Click on Advanced.
- Enter the following settings:
- Port is set to 995 and Use SSL is checked.
- Authentication is set to Password.

- Close the Accounts window. Your email is set up.
Phone and iPad
- Add a new account, open Settings application
- Touch Mail, Contacts, Calendars
- Touch Add Account...
- Touch Other...
- Touch Add Mail Account..
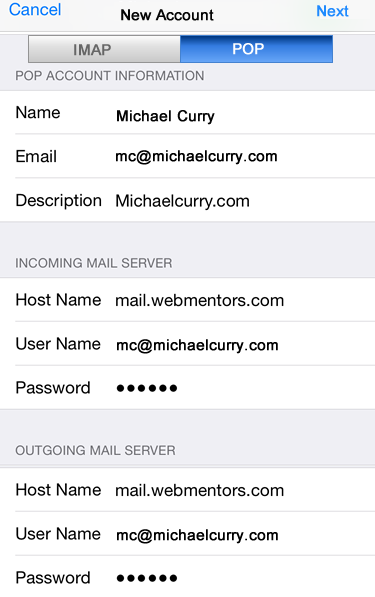
- Enter your name, email, password, and a description for the account. Touch Next.
- Select POP.
- Enter the server settings, incoming and outgoing should be mail.webmentors.com. Your email address is also your username.
- Touch Next, and check marks should appear next to the settings. If not, double check they are correct.
- Touch Save.
- In the list of Accounts, Touch the Account you just set up (e.g. Michaelcurry.com in this example)
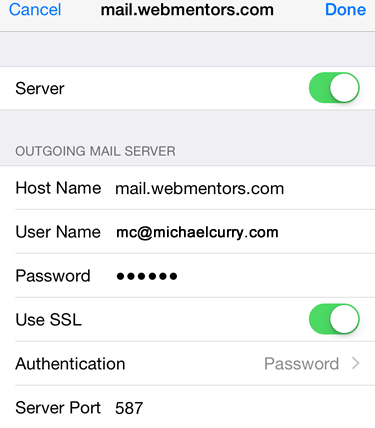
- Touch Outgoing Mail Server and verify the following settings:
- Use SSL is enabled
- Authentication set to Password
- Server Port set to 587
- Touch Done.
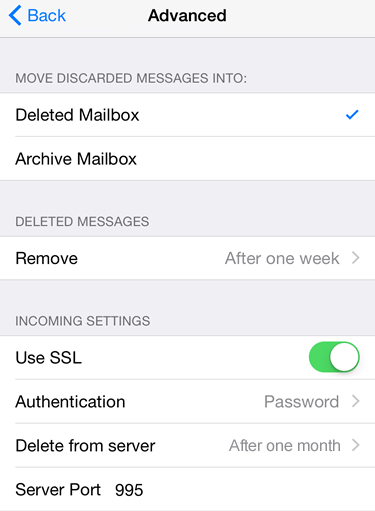
- Touch Advanced.
- Verify the following settings:
- Use SSL is enabled
- Authentication set to Password
- Delete from Server set to After 30 days
- Server Port set to 995
- Click Done.
- Click Account
- Click Done.
Android
- Open Applications tray, select My Accounts
- Select Add Account
- You will be at the Set-Up accounts menu with several other social network icons.
- Select Email, then other (POP3)
- Enter your full email address and password.
- Touch Manual setup.
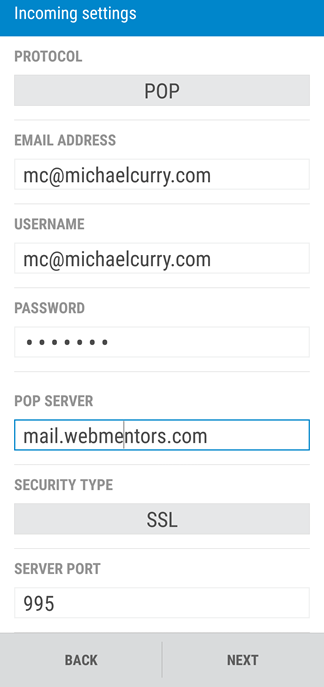
- Under incoming settings, enter the following:
- Username is your email address
- POP server is mail.webmentors.com
- Security type is SSL
- Server Port is 995
- Touch Next.
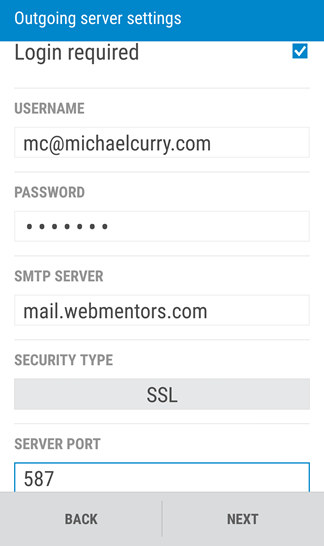
- Under Outgoing Settings, enter the following:
- Check login required
- SMTP server is mail.webmentors.com
- Security is SSL
- Server Port is 587
- Touch Next.
- Under Add Account, enter the following:
- Give your account an easy to remember name (e.g. webmentors)
- Enter your name
- Tap Finish Setup again to complete your email set-up.